woody汉化后进不了x-windows了?
时间:2003-08-13
来源:互联网
这是我的XF86Config-4,附件是XFree86.0.log信息。
# XFree86 4 configuration created by pyxf86config
Section "ServerLayout"
Identifier "Default Layout"
Screen 0 "Screen0" 0 0
InputDevice "Mouse0" "CorePointer"
InputDevice "Keyboard0" "CoreKeyboard"
InputDevice "DevInputMice" "AlwaysCore"
EndSection
Section "Files"
# RgbPath is the location of the RGB database. Note, this is the name of the
# file minus the extension (like ".txt" or ".db"). There is normally
# no need to change the default.
# Multiple FontPath entries are allowed (they are concatenated together)
# By default, Red Hat 6.0 and later now use a font server independent of
# the X server to render fonts.
FontPath "/usr/X11R6/lib/X11/fonts/xp"
FontPath "unix/:7100" # local font server
EndSection
Section "Module"
Load "dbe"
Load "extmod"
Load "fbdevhw"
Load "glx"
Load "record"
#Load "freetype"
Load "type1"
#Load "dri"
Load "xtt"
EndSection
Section "InputDevice"
# Specify which keyboard LEDs can be user-controlled (eg, with xset(1))
# Option "Xleds" "1 2 3"
# To disable the XKEYBOARD extension, uncomment XkbDisable.
# Option "XkbDisable"
# To customise the XKB settings to suit your keyboard, modify the
# lines below (which are the defaults). For example, for a non-U.S.
# keyboard, you will probably want to use:
# Option "XkbModel" "pc102"
# If you have a US Microsoft Natural keyboard, you can use:
# Option "XkbModel" "microsoft"
#
# Then to change the language, change the Layout setting.
# For example, a german layout can be obtained with:
# Option "XkbLayout" "de"
# or:
# Option "XkbLayout" "de"
# Option "XkbVariant" "nodeadkeys"
#
# If you'd like to switch the positions of your capslock and
# control keys, use:
# Option "XkbOptions" "ctrl:swapcaps"
# Or if you just want both to be control, use:
# Option "XkbOptions" "ctrl:nocaps"
#
Identifier "Keyboard0"
Driver "keyboard"
Option "XkbRules" "xfree86"
Option "XkbModel" "pc105"
Option "XkbLayout" "us"
EndSection
Section "InputDevice"
Identifier "Mouse0"
Driver "mouse"
Option "Protocol" "IMPS/2"
Option "Device" "/dev/psaux"
Option "ZAxisMapping" "4 5"
Option "Emulate3Buttons" "yes"
EndSection
Section "InputDevice"
# If the normal CorePointer mouse is not a USB mouse then
# this input device can be used in AlwaysCore mode to let you
# also use USB mice at the same time.
Identifier "DevInputMice"
Driver "mouse"
Option "Protocol" "IMPS/2"
Option "Device" "/dev/input/mice"
Option "ZAxisMapping" "4 5"
Option "Emulate3Buttons" "no"
EndSection
Section "Monitor"
Identifier "Monitor0"
VendorName "Monitor Vendor"
ModelName "DDCPROBED"
DisplaySize 310 230
HorizSync 30.0 - 70.0
VertRefresh 50.0 - 160.0
Option "dpms"
EndSection
Section "Device"
Identifier "Videocard0"
Driver "nvidia"
VendorName "Videocard vendor"
BoardName "RIVA TNT2"
EndSection
Section "Screen"
Identifier "Screen0"
Device "Videocard0"
Monitor "Monitor0"
DefaultDepth 24
SubSection "Display"
Depth 24
Modes "800x600" "640x480"
EndSubSection
EndSection
Section "DRI"
Group 0
Mode 0666
EndSection
上传的附件
| xfree86.txt (21.8 KB, 90 次查看) |
作者: qyl1 发布时间: 2003-08-13
是我的系统有问题么?
怎么附件显示成了“qyl1 上传了这个图片:”
怎么附件显示成了“qyl1 上传了这个图片:”
作者: carlos 发布时间: 2003-08-13
上传不了。
作者: qyl1 发布时间: 2003-08-13
应该是上传了,但论坛程序有问题... 显示不出来
作者: carlos 发布时间: 2003-08-13
多谢,问题解决了.
http://www.linuxsir.org/bbs/showthre...threadid=36855
http://www.linuxsir.org/bbs/showthre...threadid=36855
作者: qyl1 发布时间: 2003-08-13
相关阅读 更多
热门阅读
-
 office 2019专业增强版最新2021版激活秘钥/序列号/激活码推荐 附激活工具
阅读:74
-
 如何安装mysql8.0
阅读:31
-
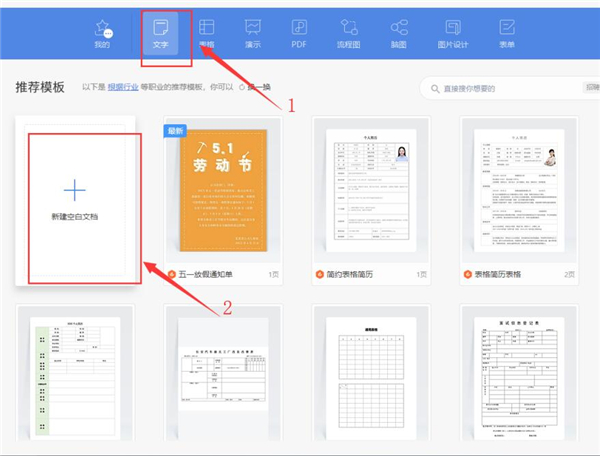 Word快速设置标题样式步骤详解
阅读:28
-
 20+道必知必会的Vue面试题(附答案解析)
阅读:37
-
 HTML如何制作表单
阅读:22
-
 百词斩可以改天数吗?当然可以,4个步骤轻松修改天数!
阅读:31
-
 ET文件格式和XLS格式文件之间如何转化?
阅读:24
-
 react和vue的区别及优缺点是什么
阅读:121
-
 支付宝人脸识别如何关闭?
阅读:21
-
 腾讯微云怎么修改照片或视频备份路径?
阅读:28


